Polka Dot Flower Vase
From: SjoesJoe Likes Lovely Things from ivillage

Empty glass bottles or mini-vases
dot labels (can get at the office supply store) if not available, use a puncher and put glue
ribbon, scissors and double-sided tape
Instructions:
Instructions:
1. Have your kid decorate the vase with the dot labels.
2. Next, measure the width of the base of the vase with ribbon and cut to fit, leaving a little extra to ensure it'll make it all the way around.
3. Then have your kid take the double sided tape and secure the ribbon -- or they can tie it instead.
4. Then your kid can add more ribbon or polka dots to finish his masterpiece.
This makes a perfect holiday gift for his teacher -- just add flowers!

 Here's what you'll need... • Construction paper
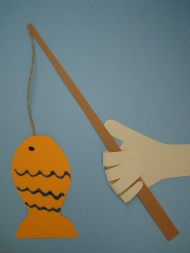
 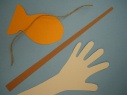 Here's how you make it... 1. Trace and cut out a hand print from construction paper, make sure you include the wrist and upper arm. Cut out a long, straight paper 'fishing pole', a short piece of 'fishing line' from your twine, and a colorful fish.
 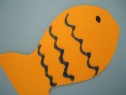 2. Now you'll need to decorate your fish. We used some glitter glue to make fins, but let the kids get creative! Once you've decorated your fish, glue the handprint onto a piece of construction paper (just glue the wrist and palm, not the fingers!), glue the fishing pole into the palm of the hand, then glue the twine onto the top of the pole, and lastly, glue the fish onto the end of the fishing line.
  3. Now all you need to do is glue the fingers around the fishing pole. One by one, glue each finger tip to the palm of the handprint! If you wish, write on a special message!
 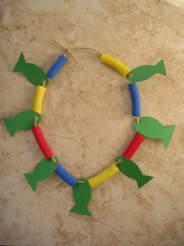 Here's what you'll need... • Macaroni with holes big enough to string (Rigatoni was used in the picture)
  Here's how you make it...
 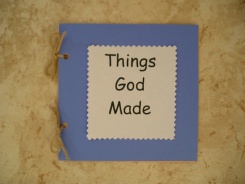 Here's what you'll need... • 4-5 pieces of construction paper, your choice of color
 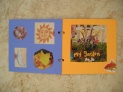 2.Using the magazines, cut out pictures of things that God Made, perhaps it is your favorite things? Another option is to go for a walk outside and collect some real things God made, like leaves, flowers, and pebbles. Glue all of your pictures or treasures into your book and you will have a constant reminder of all of God's beautiful creations.
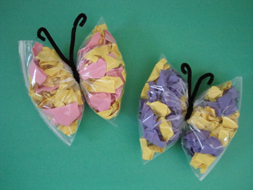 Here's what you'll need...• Zip-lock baggie
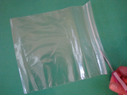 Here's how you make it...1. Cut the top off the baggie that sticks up above the zipper.
 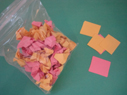 2. Cut construction paper into squares, crumple them and place them inside the baggie. Fill the baggie about ⅔ full.
 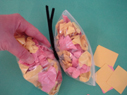 3. Squeeze out the air in the baggie and seal it tight. Gather it in the middle and wrap and twist a pipe cleaner around the center. Twirl the ends to make the butterfly's antennas. There are other ways to do this craft. You can slide flat pieces of paper inside the baggie, fold the baggie accordion-style and secure with a pipe cleaner. You can also use a clothespin for the center rather than a pipe cleaner.


