Showing posts with label Teen craft. Show all posts

Saturday, September 24

Gift Tags: Retro Style

 Gift Tag in Retro Style

Personalize your next gift for someone with this funky retro tag. This is a great way to use up left-over scrapbook or card making supplies and is simply a lot of fun to make. Depending on the name of the recipient, punch out the appropriate letter of their name to embellish the tag. This tag is finished within 10 minutes.

Gift Tag in Retro Style - Blue and Brown
Photos from craftideas.info


For this project you will need:

- DCVW The Paper Stack “Retro Prints” (pack of 72 sheets of 12x12”
  paper), sheet of beige, turquoise-blue and white spotted paper
- tag from shopping or self-made tag
- white textured cardstock
- Fiskars Shape Cutter with alphabet templates
- foam stamp with flower motif
- brown pigment ink pad
- clear embossing powder
- embossing heat gun
- turquoise half bead 
- turquoise colored sheer ribbon
- turquoise colored eyelet
Anhänger
Tag sample size from craftideas.info
Instructions:
1. Cover the front and back side of the tag with your scrapbook paper.
2. Create a second white cardstock tag that measures 4 x 11 cm. Punch a hole in the top of this tag and use the Fiskars Shape Cutter to cut out the desired letter.
3. Stamp a flower onto the tag and emboss. Glue on a turquoise colored half bead onto the flower.
4. Insert an eyelet through both tags and set with eyelet tool.
5. Tie a ribbon through the eyelet hole.

This is the basic tag form. It measures 10 x 5 cm. Of course, you can cut thick cardstock to a rectangular shape of this measurement and it will work just as well.

More ideas, please visit Craftideas.info

Saturday, September 17

Teen Craft: Dried Flower Sachet


How to Make a Sachet Using Flowers
By Sherri Osborn, About.com Guide


MH900309010.jpg
Sample of dried flower from Microsoft clip art
Make one of these simple dried flower sachets for every drawer and your nose will get a pleasant surprise every time you open one. They also make unique gifts.

Materials Needed:
               Tulle
               Ribbon
               Dried Flowers
               Scissor
               Hole Puncher

Instructions:

1. Dry your flowers as described on the page: Save Your Summer Blooms.
2. Cut a circle, about 12-inches across, out of your tulle. Tracing around a dinner plate seems to work well. Use a hole puncher or the scissors to make holes around the edge of the fabric. You will want the holes to be about an inch in from the edge. Each hole should be around 1-inch apart.
sachetthumb.jpg
Sample of Dried flower sachet
3. Thread a piece of ribbon, in-and-out, through the holes. Do not cut the ribbon or cord until you have it threaded into the holes with about 4-6 inches to spare on each end while the fabric is laying flat. Now, Simply pull both ends of the cord or ribbon tight to gather the top of the bag together to make a bowl shape.
4. Fill your tulle 'bowl' with dried flowers. Pull both ends of the cord or ribbon tight to close and tie. Place your sachet in your drawer or wrap and give it as a gift. If the smell of the flowers fade, simple spritz the sachet with perfume

Monday, September 12

Starter Craft: Simple Beaded Jewelry


How To Make Simple Beaded Jewelry
By Sherri Osborn, About.com Guide

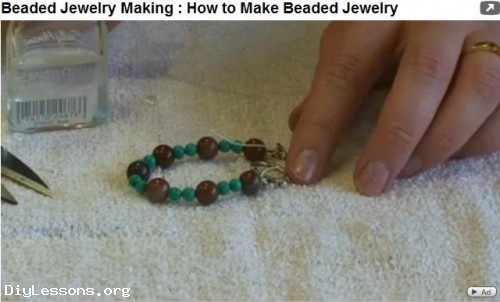
Picture from DiyLessons.org

Here are some easy steps in creating your own jewelry.

Here's How:
1.            Buy some elastic thread and medium sized beads. Seed beads are too small and pony beads are too big.
2.            Decide what kind of jewelry you want to make. This idea works well for necklaces, bracelets, rings, and anklets!
3.            Cut a piece of elastic thread about 2 - 4 inches longer than you need for your project.
4.            Tie a bead onto one end of the piece of thread so the other beads do not fall off once you thread them on.
5.            String desired beads onto the elastic.
6.            Tie the two ends of the elastic together.
7.            Cut off the extra thread.
Tips:
1.            Alphabet beads are fun to use for this craft!
2.            If you make bracelet or ring you will want it snug around your wrist or finger so it doesn't slide off.
3.            If you want to get fancier, you can position the beads where you want them by strategically tying small knots in the elastic.
What You Need:
               Elastic Threads
               Beads
More ideas in Familycraft About.com

Thursday, September 8

Teen Craft: Friendship Bracelets


Camp Crafts: Friendship Bracelets 

Tied with a Sliding Knot


How to Tie a Sliding Knot
tie a sliding knot Camp Crafts: Friendship Bracelets Tied with a Sliding Knot
How to Tie a Sliding Knot Diagram

The sliding knot diagram is easy to follow, but it can get a little tricky if you create the knot loosely and then tighten it sloppily. My advice: be really careful about keeping all the strands in place as you tighten it – trust me, it will save you plenty of headaches and tangled cording later.
sliding knot bracelet Camp Crafts: Friendship Bracelets Tied with a Sliding Knot
Make a friendship bracelet with a sliding knot
Here’s a picture of the sliding knot in action on the back of the braided friendship bracelet.

What You Need to Make These Easy Friendship Bracelets

  • Leather lacing (in at least three colors for the braided bracelet).
  • Six wooden beads with bead holes big enough for the leather lace to fit through (for the beaded bracelet).
  • You can also use colorful nylon cording instead of leather for either of these friendship bracelets.
For the beaded friendship bracelet, first cut the end of the leather lace at an angle, which will make it easier to slide on the beads. Then simply tie a regular knot, slide on a bead, and repeat until all the beads are on your bracelet.
Finish off with the sliding knot.
leather lace end for beadin Camp Crafts: Friendship Bracelets Tied with a Sliding Knot
Cut the leather lacing for easy beading
friendship bracelet with be Camp Crafts: Friendship Bracelets Tied with a Sliding Knot
Easy Friendship Bracelet with Beads
For the braided leather bracelet, knot together three strands of leather laces. Keep one of them longer than the rest on the top end, because you will use it to tie the bracelet off.
Braid the laces, then tie another knot to keep the braid together. Then simply clip off two of the three stands near the knot as shown in the first photograph below.
Finish off with the sliding knot.
braided leather bracelet Camp Crafts: Friendship Bracelets Tied with a Sliding Knot
Braided Leather Friendship Bracelet
braided friendship bracelet Camp Crafts: Friendship Bracelets Tied with a Sliding Knot
Easy Braided Leather Friendship Bracelet
Check  Craft Jr. for other camp crafts... :)

Thursday, June 2

Teen Craft: Topiary Tree

Project: Topiary Tree
designed by Twila Lenoir

This is a lovely homemade gift, especially if you coordinate the flower colors to suit the decor of the room where it will displayed.
Homemade Topiary Tree

Supplies:

hot glue gun
two 2 inch styrofoam balls
4 inch clay pot
twig from the yard
acrylic Paint in black, brown and gray for the pot
about 6 yards of flat red lace
6 yards of pink or light purple ribbon
2 dozen silk white bud roses (dollar stores often have these)
optional - small sprays of baby's breath or small white flowers
light gauge wire
moss
sand, pebbles or marbles as weight in the pot 


Topiary Tree


Craft Instructions:

1. Dispense hot glue to the tip of a sturdy twig and insert into one of the 2 inch styrofoam balls, to a depth of about an inch. Let the glue cool and set.

2. Clip the silk roses at the stem and neck, so that all you have is green leaves and the rose. Use hot glue to position the roses all around the styrofoam ball, leaving spaces for lace and ribbon.

3. Make bows out of ribbon and flat lace, twisting a piece of wire into the center of each bow.

Here's how: make four loops on each bow, two at the top and two on the bottom and twist the wire into the middle. The illustration at right may help you see how this should look.

Leave a little length of wire on the end to stick into the styrofoam ball.

Apply hot glue to the end of the wire and the bottom of the ribbons or lace on one bow, then quickly insert it into the styrofoam ball. Repeat with all the ribbon and lace bows, filling in all around the roses until your styrofoam ball is covered.

4. Optional: you can glue in some dried baby's breath or small white flowers to cover any bare spaces.

5. Prepare the clay pot by making sure it is clean of any debris and dry. Paint it in a base of black acrylic paint and let the paint dry.

With a makeup sponge, or something similar, sponge on a little of the gray paint and let it dry.

With a very fine paint brush, paint on some brown squiggly lines through the pot so that it looks like granite.

6. Add sand, pebbles, marbles or other heavy material to weight the pot and make it less likely to fall over.

7. Cut the second styrofoam ball in half and glue one half into the top area of the pot. When this is dry, apply hot glue to the end of your topiary twig and insert it into the middle of the ball in the pot.

8. Finally, use hot glue to apply a layer of moss to the styrofoam ball half, covering it completely.


Suggestion: You can also use dried leaves and flowers, laces, anything actually. Even jelly beans, just used a tooth pick . My first topiary was all buttons that I pick up from anywhere. My topiary was very beautiful. Too bad, that was 25 years ago...But I was able to make it while I was  in grade school :) 


More Homemade Crafts

Wednesday, May 25

Teen Craft: Flip-Flops

Flip-Flop Fun Craft
by Linette Gerlach

I find this craft very stylish and could go whatever mood you have. You can also design according to the clothes you will wear in the beach, for example. Hope you will enjoy dressing your flip flops. :)

Materials:

  • 1 pair of flip-flops per person
  • fishing line or thread
  • beads and other decorations to adorn the flip flops
  • 6 -8 yards fat yarn or ribbon per pair of flip flops
  • large-eye needles


Instructions:

1. Give each child 3 - 4 yards of yarn per shoe to start. The amount of yearn used for each shoe will depend on the size of the shoe and the width of the yarn; you can always tie more on later if the yarn runs out before the entire shoe strap has been wrapped.

2. Start by wrapping the yard one time around the strap, and knot it at the base where the strap meets the shoe at the side (not in the center of the thong). Tuck the knot under the strap, and work the end of the string into your weave once you get started.

3. Start your weave: once you’ve secured one end of the yarn to the shoe, begin to wrap the flip-flop straps with yarn. Ball the yarn in one hand, and make a loop by taking the yarn under the strap and then feeding the yarn ball around the strap and through the loop to make a knot. Pull the string tight.
 

4. Wrap the yarn snugly around the strap, and make another loop and feed the yarn through. Repeat the process over and over to cover the strap with this weave.

5. If you want to add beads or other embellishments, you can add them by stringing them onto the yarn while you’re wrapping.


6. If the beads have a hole that is too small to add them directly to the yarn, you can string one or more beads onto the fish line. Use the fish line and a needle to attach them to the shoe and tie off each one with a knot as you go. 

7. When you’re done wrapping the strap, knot it again at the end.

Tip from the Author: 
 
Buttons would make another fun embellishment for your flip flops. They could be woven into the yarn, or attached with fish line or string.

Source: Amazing Moms
For more amazingmoms craft, you can visit Amazing Moms website.